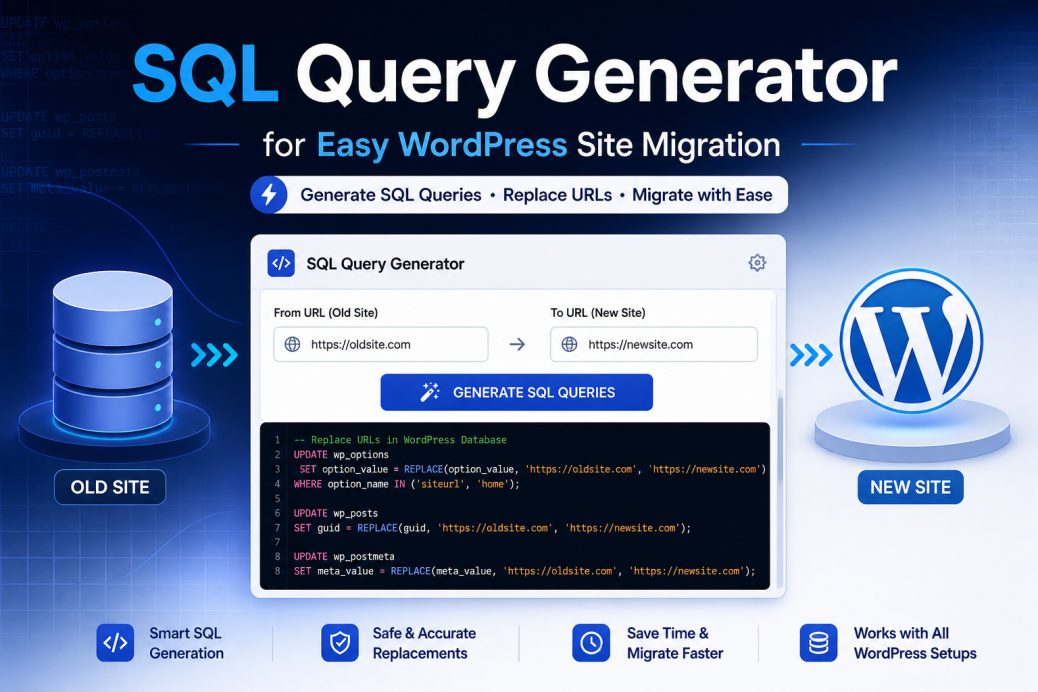
Moving a WordPress site to a new domain or host? If so, every URL stored in your database needs updating, or your site breaks. Our free SQL Query Generator creates ready-to-run MySQL queries that replace old URLs with new ones across all key WordPress tables. Simply enter your details below and get working code in seconds.
Why You Need an SQL Query Generator for WordPress Migration
WordPress stores your site URL in dozens of places across the database. As a result, simply uploading files to a new server and pointing DNS is not enough. Internal links, image paths, menu URLs, and site settings all contain hardcoded references to your old domain.
Without updating these references, several things go wrong:
- First, images and media files show broken thumbnails or fail to load entirely.
- Second, internal links point visitors back to your old domain (or return 404 errors).
- Third, the WordPress admin dashboard redirects to the wrong URL, locking you out.
- Additionally, menus, widgets, and custom fields display incorrect links throughout your site.
- Finally, SEO suffers because search engines encounter redirect chains and broken pages.
Manually finding and replacing URLs in the database takes time and invites mistakes. For instance, a single typo in a SQL query can corrupt your data. However, our SQL Query Generator eliminates that risk by producing clean, accurate queries you can copy and run immediately.
How to Use This SQL Query Generator
Using the tool takes about 30 seconds. To get started, follow these three steps:
Step 1: Enter your old site URL. First, type the full URL of your current (or old) WordPress site in the “From” field. Make sure to include the protocol (http:// or https://) but leave out any trailing slash. For example: https://oldsite.com
Step 2: Enter your new site URL. Next, type the full URL of your new WordPress site in the “To” field. Similarly, include the protocol and skip the trailing slash. For example: https://newsite.com
Step 3: Set your table prefix. Finally, check your WordPress table prefix. The default is wp_. However, if you changed it during installation (a common security practice), enter your custom prefix here instead. Not sure what yours is? In that case, open your wp-config.php file and look for the line $table_prefix = 'wp_'; to find it.
After completing these steps, click Generate and the tool produces all the SQL queries you need. Then, simply copy them and run them in your database manager.
Generate SQL Queries
What Each SQL Query Does
Our SQL Query Generator targets four core WordPress database tables. Below is what each query updates and why it matters.
wp_options (Site URL and Home URL)
This is the most critical table to update. Specifically, WordPress reads two rows from wp_options every time a page loads:
- siteurl controls the URL WordPress uses to build admin paths and load core files.
- home defines the public-facing URL visitors see in their browser address bar.
If these two values still point to your old domain, your entire site breaks. In particular, the admin panel redirects endlessly, and the front-end loads the wrong address. Fortunately, the generated query updates both rows in a single statement.
wp_posts (Post Content and GUIDs)
The wp_posts table holds your pages, posts, media attachments, and custom post types. Essentially, two columns store URLs:
- post_content contains every link, image tag, and embedded URL inside your post and page content. For example, a blog post with 10 images has 10 hardcoded URLs that need updating.
- guid is a globally unique identifier WordPress assigns to each post. Although WordPress documentation says GUIDs should not change, updating them during a full domain migration prevents issues with RSS feeds serving duplicate content.
wp_postmeta (Custom Fields and Plugin Data)
Many themes and plugins also store URLs in the wp_postmeta table. For instance, these include:
- Featured image file paths.
- Page builder layout data (Elementor, WPBakery, and Divi all store URLs here).
- Custom field values from ACF (Advanced Custom Fields) or similar plugins.
- Furthermore, SEO plugin data like canonical URLs and social sharing images.
Skipping this table is one of the most common migration mistakes. At first glance, everything looks fine. However, featured images break and page builder layouts show missing assets.
wp_comments (Comment Author URLs)
The wp_comments table stores the website URL that commenters entered alongside their comments. Although less critical than the other tables, updating this keeps your comment section clean and avoids linking back to a domain you no longer own.
How to Run These Queries in phpMyAdmin
After generating your queries, you need a way to execute them against your WordPress database. In most cases, phpMyAdmin is the best tool since nearly every hosting provider includes it.
Finding phpMyAdmin
Most hosting panels provide direct access. Specifically:
- cPanel: Look for the “Databases” section and then click the phpMyAdmin icon.
- Plesk: Go to Databases, find your WordPress database, and click “phpMyAdmin.”
- Custom panels (Cloudways, RunCloud, GridPane): Instead, check the database management section for a phpMyAdmin or database client link.
Running the Queries
- First, open phpMyAdmin and select your WordPress database from the left sidebar. Make sure you pick the correct one, especially if your hosting account has multiple databases.
- Next, click the SQL tab at the top of the page.
- Then, paste all the generated queries into the text box.
- After that, click Go (or Execute). phpMyAdmin runs each statement in order.
- Finally, check the results. You should see “X rows affected” for each query, confirming the replacements worked.
Alternative Tools
phpMyAdmin is not the only option. Alternatively, you can run the queries through:
- MySQL command line if you have SSH access to your server.
- Adminer (a lightweight single-file database manager).
- TablePlus, DBeaver, or Sequel Pro if you prefer desktop database clients.
- WP-CLI using the
wp search-replacecommand (more on this below).
Important: Back Up Your Database First
Always export a full database backup before running any migration queries. Otherwise, a single wrong URL in the “From” or “To” field can corrupt data across thousands of rows, and there is no undo button.
Here is how to create a quick backup:
- phpMyAdmin: First, select your database, click Export, choose “Quick” method with SQL format, and then click Go. Save the downloaded .sql file somewhere safe.
- WP-CLI: Alternatively, run
wp db export backup.sqlfrom your site’s root directory. - Hosting panel: Similarly, many hosts offer one-click database backups in their control panel.
Keep this backup until you have fully verified your migrated site works correctly. In other words, do not delete it until everything checks out.
Common WordPress Migration Scenarios
Our SQL Query Generator works for every type of WordPress migration. Below are the most common scenarios with example values to enter.
Switching from HTTP to HTTPS
Installing an SSL certificate changes your URL from http:// to https://. In this case, use the SQL Query Generator with:
- From:
http://yoursite.com - To:
https://yoursite.com
As a result, this updates every internal reference to use the secure protocol.
Moving from Local Development to Live Server
Developers often build sites on localhost before deploying. In that case, use:
- From:
http://localhost/mysite - To:
https://mysite.com
Pay attention to subfolder paths. For instance, if your local install runs inside a directory (like /mysite), make sure to include that full path in the “From” field.
Changing Domain Names (Rebranding)
Switching from an old domain to a new one is the most common use case. For this scenario, use:
- From:
https://oldsite.com - To:
https://newsite.com
After running the queries, also update your wp-config.php if it contains hardcoded WP_HOME or WP_SITEURL constants.
Moving from Subdirectory to Root
Some WordPress installs live in a subfolder like /blog or /wp. To fix this, use:
- From:
https://yoursite.com/blog - To:
https://yoursite.com
Staging to Production
Likewise, moving a staging site to production (or the reverse) follows the same pattern:
- From:
https://staging.yoursite.com - To:
https://yoursite.com
Serialized Data: What SQL Queries Cannot Fix
Our SQL Query Generator handles most migration needs perfectly. However, there is one important limitation you should know about. WordPress themes and plugins often store data as “serialized strings” in the database. For example, a serialized string looks like this:
a:1:{s:3:"url";s:29:"https://oldsite.com/image.jpg";}Notice the s:29: part? That number represents the character count of the URL. When a SQL REPLACE changes oldsite.com to newsite.com, the URL length changes. But the character count number stays the same. Consequently, this mismatch “breaks” the serialized string, and WordPress cannot read that data anymore.
What breaks when serialized data corrupts:
- First, widget settings go blank.
- Second, theme customizer options reset to defaults.
- Additionally, page builder layouts lose sections or styling.
- Furthermore, plugin settings (like Yoast SEO, WooCommerce, or contact form configurations) disappear.
How to Fix Serialized Data
SQL REPLACE works perfectly for the vast majority of your database. Meanwhile, serialized data typically lives in wp_options (widget and theme settings) and wp_postmeta (page builder layouts). For these edge cases, use one of these tools after running the SQL queries:
- WP-CLI search-replace (recommended): Run
wp search-replace 'oldsite.com' 'newsite.com' --all-tablesfrom the command line. This command handles serialized data correctly because it recalculates character counts automatically. - Better Search Replace plugin: Alternatively, install this free WordPress plugin, enter your old and new URLs, select all tables, and run. It safely processes serialized data within the WordPress admin.
- Search Replace DB script by Interconnect/IT: Another option is this standalone PHP script you upload to your server, run in the browser, and delete after use.
Tip: For best results, run the SQL queries from our generator first for speed. Then, run WP-CLI or Better Search Replace as a second pass to catch any serialized values the SQL missed.
WordPress Multisite Migration
Running a WordPress Multisite network? This SQL Query Generator still works. However, keep these important details in mind:
- Run queries per subsite. Each subsite has its own table prefix. Specifically, the main site uses
wp_, while subsites usewp_2_,wp_3_, and so on. Therefore, generate and run separate queries for each one. - Update network-level tables manually. In addition, three tables require manual attention:
wp_blogs,wp_site, andwp_sitemeta. These store network-wide domain settings that our generator does not cover. - Check domain mapping. Also, if you use domain mapping for subsites, update those mappings in your Multisite settings after migration.
After Migration: Verification Checklist
Running the SQL Query Generator and executing the queries is only half the job. Afterward, walk through this checklist to confirm everything works:
- First, open your homepage and check that the URL in the browser bar shows your new domain.
- Then, visit 3-5 random posts and pages. Verify that images load and internal links work.
- Next, test the WordPress admin panel (
/wp-admin/). Log in and navigate to Settings > General. Confirm that both “WordPress Address” and “Site Address” show the new URL. - Also, check media files. Open the Media Library and click on a few images. The file URL should point to your new domain.
- Additionally, inspect your menus (Appearance > Menus). Custom links may still point to the old URL if they were added manually rather than selected from pages/posts.
- Furthermore, test forms, checkout pages, and any plugin that stores URL-based settings.
- After that, clear all caches: your WordPress caching plugin, CDN cache (Cloudflare, etc.), and your browser cache.
- Moreover, update
wp-config.phpif it definesWP_HOMEorWP_SITEURL. - Similarly, update your
.htaccessor Nginx config if any rewrite rules reference the old domain. - Finally, submit your new sitemap in Google Search Console to speed up re-indexing.
Tips for a Smooth WordPress Migration
Follow these best practices when using our SQL Query Generator to avoid common pitfalls:
- Include the protocol. Always use the full URL with
http://orhttps://in both fields. Otherwise, leaving it out causes partial replacements that break other values in the database. - Skip the trailing slash. Enter
https://yoursite.comand nothttps://yoursite.com/. In other words, our generator handles paths correctly without it. - Check your table prefix. The default is
wp_but many security plugins change it. As a result, a wrong prefix means the queries target tables that do not exist, and nothing gets updated. - Run queries before visiting the new site. If you visit the new URL before running queries, WordPress may create redirect cookies that interfere with your login. Therefore, run queries first, then open the site.
- Do not run queries twice. If you already migrated and need to change URLs again, instead use the current URL as the “From” value. Running the original queries a second time finds no matches and consequently changes nothing.
Frequently Asked Questions
Do I need to update GUIDs during migration?
For a full domain change, yes. GUIDs help RSS readers identify unique posts. Without updating them, old GUIDs can cause RSS feeds to show duplicate entries. However, if you are only switching from HTTP to HTTPS on the same domain, then updating GUIDs is optional.
Can these queries break my site?
Only if you enter incorrect URLs in the “From” or “To” fields. For instance, a typo could replace the wrong strings across your database. That is why backing up first is essential. With a backup, you can always restore and try again.
What about WooCommerce stores?
WooCommerce stores product data, order details, and settings in wp_posts, wp_postmeta, and wp_options. These are the same tables our queries target. As a result, the generator covers WooCommerce sites. Just make sure to run WP-CLI or Better Search Replace afterward to catch serialized WooCommerce settings.
Should I update wp-config.php too?
Yes, especially if your wp-config.php file defines WP_HOME or WP_SITEURL constants. Since these override the database values, you must open the file and update the URLs to match your new domain. In addition, update the database name, username, password, and host if your new server uses different credentials.
How do I handle multisite migrations?
Generate queries for each subsite separately using its specific table prefix (like wp_2_, wp_3_). After that, manually update wp_blogs, wp_site, and wp_sitemeta tables with your new domain. For more details, see the Multisite section above.
Can I use this tool for non-WordPress databases?
This SQL Query Generator produces queries specifically for WordPress table structures. Although the SQL REPLACE syntax works on any MySQL database, the table names (wp_options, wp_posts, etc.) are WordPress-specific. Therefore, you would need to adjust table and column names for other CMS platforms.
What is the difference between this tool and WP-CLI search-replace?
Our SQL Query Generator creates raw MySQL queries you can run in phpMyAdmin or any database client. On the other hand, WP-CLI search-replace is a command-line tool that requires SSH access to your server. The main advantage of WP-CLI is that it handles serialized data correctly. Because of this, many developers use both: our generator first for speed, then WP-CLI as a cleanup pass.
Do I need to clear caches after migration?
Absolutely. Cached pages and objects still contain old URLs. Therefore, clear your WordPress caching plugin (WP Super Cache, W3 Total Cache, LiteSpeed Cache, etc.), purge your CDN (Cloudflare, StackPath, etc.), and also clear your browser cache. Otherwise, old URLs keep appearing even after a successful migration.